--------------------------------------------------------------------------------------------------------------------------------------------------------------------------------------------------
Thank you for all of the love and support this little corner of the internet has received over the past several years. As friends and family members were getting married, their weddings fueled the inspiration for this blog. But as seasons of life change, my focus, along with those nearest and dearest, shifted away from the wedding planning stage and I began to neglect this blog.

I have decided to indefinitely retire Calligraphy by Shannon in an effort to pour my attention into my lifestyle blog The Scribble Pad where I will be merging past and future inspiration boards and parties. You will still be able to place orders for calligraphy, custom invitations, and hand stamped items through my etsy shop. And as always, you can stay in touch with me under my moniker, The Scribble Pad on my blog, etsy shop, facebook, and even twitter! I look forward to sharing this new adventure with you.
--------------------------------------------------------------------------------------------------------------------------------------------------------------------------------------------------

Chair Signs DIY by Carly

The lovely Carly is sharing a few more of her wedding details with us today. 
Enjoy!
 ..........

The topic for today is DIY decor! Some brides love it, some dread it- I probably fall somewhere in between. I’m not overly crafty, but there are a lot of times when I see something I like and think “I could make that for way cheaper!” Case in point: chair signs. Lots of couples are putting something on their reception chairs to distinguish their chairs (and get a cute picture). Here are some examples:


source

source

source

After deciding I wanted to do something like this, I did a little Googling, and came across this very helpful blog: Happily After All. 

You’ll notice that her inspiration sells for $30 plus shipping. I can definitely do better than that! So I set out on one of my first DIY projects. Fortunately I had already purchased two signs at Hobby Lobby a few weeks ago, since they were marked down from $2.99 each to $0.99 each, post- Valentines days. (I knew they’d come in handy for something!) My signs are a thin tin/metal material, and looked like this:


They actually came with pink ribbon threaded through predrilled holes, but I forgot to take a picture before I took out the ribbon. I’m just glad the holes are already there and I don’t need to do anything involving power tools.

I pretty much followed Happily After All’s painting directions exactly, using two coats of black acrylic as the base, followed by one coat of crackle medium, and then one coat of off-white acrylic. You don’t need much paint- small bottles will definitely suffice. I let each coat dry completely before moving on, including the backs of the signs which I painted plain black. As soon as I started to paint on the white the crackling started happening! It was way more exciting than watching paint dry (sorry, had to do it).


Unlike Happily After All, I did not free hand my words. I blew up the words Mrs. And Mr. in Microsoft Word, using Edwardian Script ITC font and 375 point text. (Note- all you really need to do is print Mrs. Just do that sign first, and then when you make the Mr. just cut off the “s” first!). The trickiest part of this whole project was cutting out the thin stencils. Printing them on cardstock would have helped make the words less flimsy. After the word was cut out, I traced it on the sign in pencil, then went over it and filled it all in with Sharpie. It looks like paint unless you really look closely. Now all I need to do is put in the ribbon and hang them from our chairs!

The finished product:


Costs 2 signs: $1.98 (Clearance at HL)
White paint: $1 (Sale at Michaels)
Black Paint: $1 (Sale at Michaels)
Crackle Medium: $3.59 (Using Michaels 40% coupon)
Paintbrushes & Sharpie: Already owned
TOTAL= $7.57 plus tax! (Take that, $30 + shipping!)


Anyone have any easy DIY projects you’d like to share? You provide the materials, I’ll provide the wine!


Wanna know more?  Follow Carly on Twitter.
Subscribe to Calligraphy by Shannon via Email

Paper Crush: Egg Press


Are you a letterpress junkie like me?  Yup, thought so.  Head on over to Design/Story and check out the fabulous buys from Egg Press.
Subscribe to Calligraphy by Shannon via Email

Idea Board 2: Raspberry and Green Apple

Custom idea board for Karlene and Mike

Row 1: Tea Bag Favors “Love is Brewing”, Green Wreath, Monogram, Grass Menu 
Row 2: Wedding Shoes, Limeade, FlowersCake 
Row 3: Apple Place Cards, FlowersTie, Izze, Raspberry Champagne  
Subscribe to Calligraphy by Shannon via Email

MFB: Drinking Jar Tags

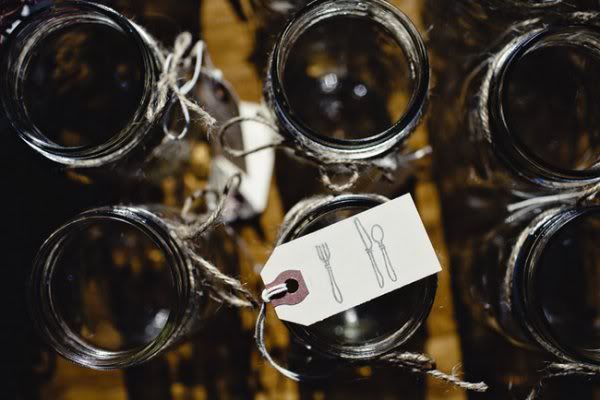
Hey all! Is anyone else as preoccupied with jars as I am? Mason, or otherwise, I love this trend in wedding decor for chic, homestyle, and fun decor. I think it will go great with our laid-back reception style.

Photobucket


I'm on a quest to collect as many jars as possible (at least 150) for our guests to drink from.


How to keep them all straight on the day of?


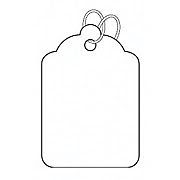
Enter the price tags my future-mother-in-law graciously gave me, left over from her real estate days. (A box of 1000 will run you $9.99).

Photobucket


{via Staples.com}


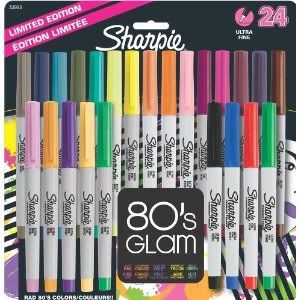
Add various Sharpies and pens, and you have yourself a party.


Photobucket


{via Amazon.com - $20.40}


I then created a rough draft of a legend of how these lovely folks are related to us.


Photobucket


Hearts and shades of pink for folks related to me and stars and shades of blue for those corresponding to my fiance. (I promise the end version of this, which will get displayed where folks pick up their glasses, will look much nicer)! Still, having this cheat sheet was clutch for keeping everyone straight, as was my guest list from Wedding Wire.

Photobucket


You can see the sea of red from my Irish Catholic family.


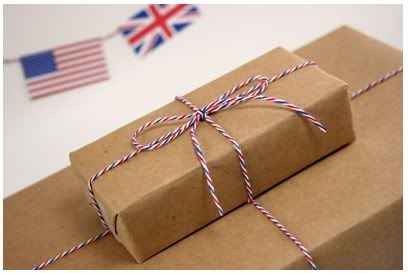
We'll tie the tags to the jars with AirMail Divine Twine.


Photobucket


The guests will pick them up when they are served Blackberry Limeade and Tamarind Iced Tea when they first arrive at the reception venue. It's DC in the summer; they'll need a cool drink!


The tags will then serve the purpose of place cards (when we add their table info on the back later), name tags, and to keep drinking glasses straight!


Fingers crossed that my next trip through the recycling bin will yield me some more glasses than the other night. Though more on that some other time. Enjoy the weekend!


Subscribe to Calligraphy by Shannon via Email

Party Supplies


Planning a party?  Be sure to snag this sweet deal from ACME party box company {hosted by Zulily}.  Get $30 worth of swag for half price {$15}

Some great goodies from ACME

via

via

via
Subscribe to Calligraphy by Shannon via Email

MFB: Invitation Draft

Hey folks! Just a quick post today on what I've been working on and a few quick tips for designing your own invitations in Microsoft Publisher that I've learned the hard way.

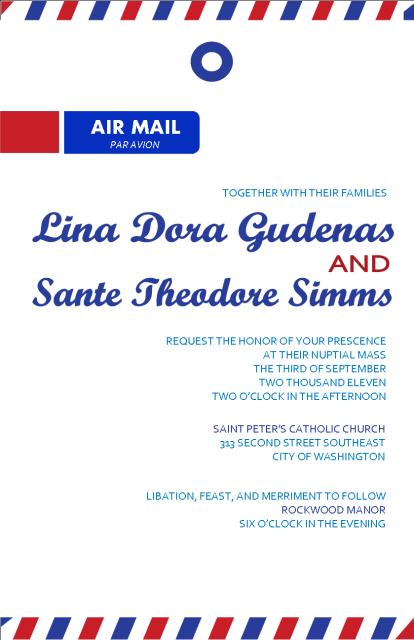
If you recall my post two weeks ago, I've been crushing hard on airmail-anything. As a result, this is what I've come up with so far. Keep in mind -- this is just a draft (the "and" is still bugging me, and the justification isn't quite right). Progress will be posted in a future MFB post.


Photobucket


A few Publisher tips I've learned along the way:


- Use "Word Art" for any large "banner" sort of items, like for our names here. It keeps you from having to adjust the font size a million times. Plus, you can stretch, turn, flip, and pretty much abuse it any way you need if you do so. Using a text box is much more limiting. Plus, you get all the outlining features, which are pretty neat.


- Shapes are your friends. In this example, I made the blue circle to mimic a button and string closure, as well as the airmail / par avion "sticker" to pay homage to some of the great airmail stickers I've seen on vintage airmail postage. Easy pee-zy.


- Save multiple files/versions. Trust me, you'll second think some of your changes, and it's great to be able to go back to a past version without trying to re-create you've already done.


That's it for now! Back to invitation creating for me. Comments and constructive criticism welcome. Updates to come. Enjoy your weekend!


Subscribe to Calligraphy by Shannon via Email

Winner Announced

Congratulations to Carly S. who won the Calligraphy by Shannon Giveaway hosted on The Scribble Pad! Carly has chosen to receive $50 offer the calligraphy for her wedding this August.
Subscribe to Calligraphy by Shannon via Email
Related Posts with Thumbnails